How to install and use a joystick
There are plenty different types of joysticks. The most common type is the resistive joystick, there the joystick positions are detected by potentiometers, one potentiometer for each axis. Other types provide a PWM signal at their output. These types are usually easily identified by the electronic chips found on them - and by their significantly higher price.
The STorM32 can handle both types, but only the situation of a resistive joystick is considered here, since they are cheaper and provide more compact solutions.
Wiring
On a resistive joystick the stick positions are detected by potentiometers, one potentiometer for each axis. Every potentiometer has three connections, the center tap (slider, wiper) and two ends.
Each potentiometer is connected to the POT port on the STorM32 board (see Pins and Connectors) as follows:
- The center tap goes to one of the pins POT-0, POT-1, or POT-2.
- One of the ends goes to the GND pin, and the other end to the 3.3 V pin.
- Be careful to not produce short cuts. This likely would damage the board.
Often the joysticks also provide a button. It can be connected to e.g. the BUT port on the STorM32 board. Sometimes two wires must be routed to both BUT pins, sometimes one wire is sufficient since GND has been provided already by having connected the potentiometers. The details need to be figured out case by case.
GUI Settings
The joystick can then be used for control in any available function by selecting the "Pot-0", "Pot-1", or "Pot-2" option, respectively, depending on whether the potentiometer associated to the stick has been connected to the POT-0, POT-1, or POT-2 pin.
A typical example would be to use the two joystick axes to control the pitch and yaw axis. Go to the [Rc Inputs] tab, and do this:
- Set the parameters Rc Pitch and Rc Yaw to "Pot-0", "Pot-1", or "Pot-2", as desired.
- Fine adjustment the control behavior, see Configure the RC Input - GUI Settings.
- Hit the [Auto Trim] button.
- It may be needed to set the parameter Rc Hysteresis to a non-zero value, e.g. 10 us, to suppress noise.
In most cases the joystick centers do not exactly correspond to the electrical centers (half voltage). This can lead e.g. to a slow drift of the camera when the axis is configured in relative mode. The solution is to adjust the Rc Pitch Trim, Rc Roll Trim, and/or Rc Yaw Trim values, which can most conveniently achieved via the [Auto Trim] feature.
Wiring Examples
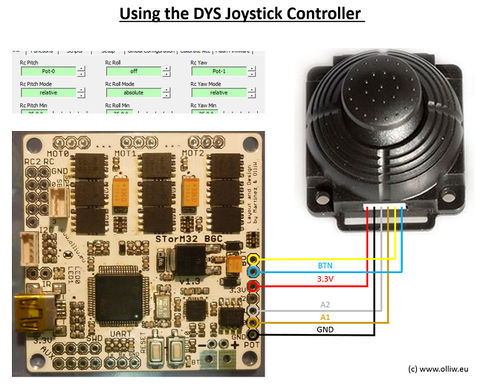
DYS Joystick Controller
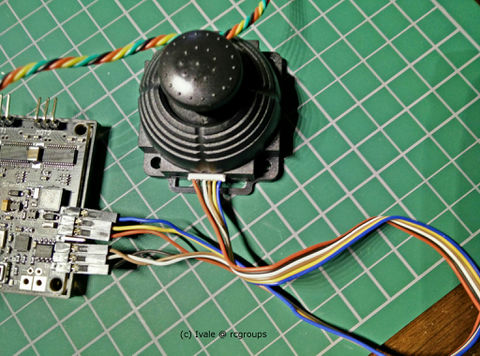
Bruce356 at rcgroups has worked out the connection: Joystick Connection Scheme.
Irun4fundotca's Joystick Solution
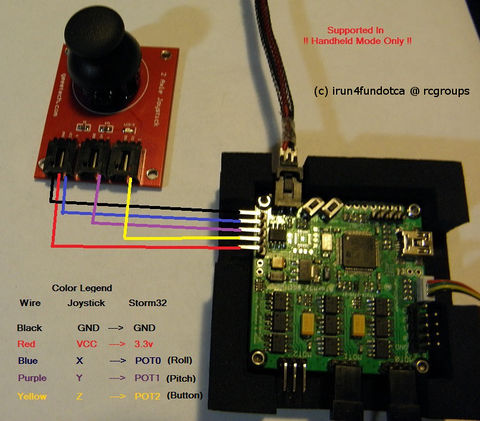
Irun4fundotca at rcgroups has worked out this example: Joystick Solution Details.
This joystick solution wont break the bank (about $5-10 USD). It's a joystick sold on ebay for about $3.59 USD with free shipping and comes with locking Molex. All that's needed is some wire, 3pin locking Molex housings, a 1-row 5-pin female Dupont header (to connect to POT pins GND, POT0, POT1, POT2, 3.3 V).
All power on the joystick's ports is shared, so only one ground and vcc is needed. The other 3 wires provide the X (Roll- POT0), Y (Pitch-POT1), Z (button-POT2) signal.
Here's the connection drawing to make it simple using roll instead of pan.


