Flashing OlliW's NT Modules
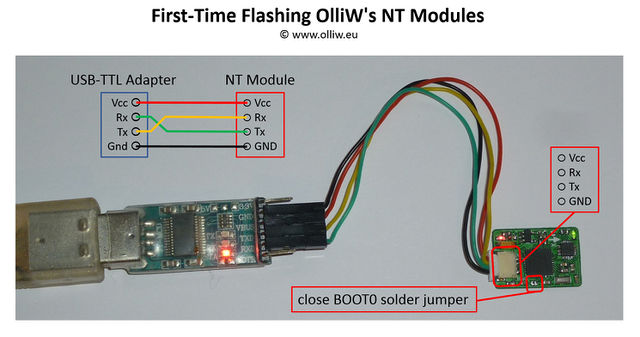
On all "OlliW" NT modules the BOOT0 pin is exposed as a solder jumper, and each module can thus be first-time flashed using a standard USB-TTL adapter. Most modules also have the SWD pins exposed, which allows a first-time flashing via a ST-Link adapter. Both flashing methods are fully supported by the GUI. Any subsequent flashing (updating) can be performed most easily by the procedure described in Updating the Firmware of NT Modules.
First-Time Flashing Using a USB-TTL Adapter
1. You will need a standard USB-TTL adapter. Ensure that it is working (drivers installed, etc.).
2. Connect the serial adapter to the NT bus pins on the NT bus connector. Do not yet power the NT module.
3. Find the BOOT0 solder jumper and close it.
4. Now power up the NT module, e.g. by connecting the NT bus connector's VCC pin to the 3.3 V or 5 V pin (either is fine) on the USB-TTL adapter.
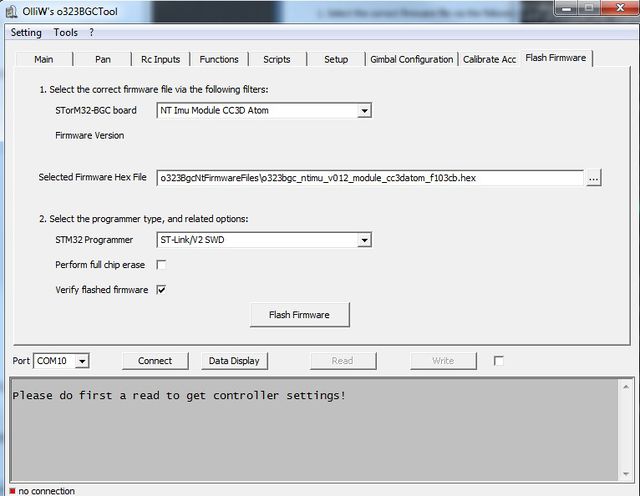
5. From the STorM32 GUI select the Flash Firmware Tab and set the fields as seen below:
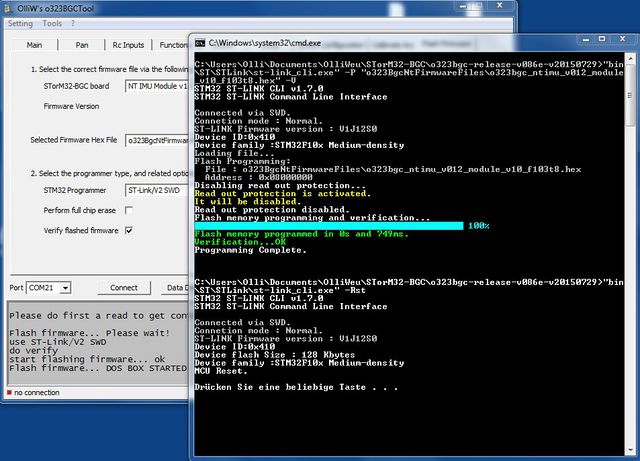
6. Select the Flash Firmware button and a DOS window opens similar to below:
7. Open the BOOT0 solder jumper again. The NT module is now ready for usage.
First-Time Flashing Using SWD
1. You will need a ST-Link V2 Programmer or similar. Ensure that it is working (drivers installed, etc.).
2. Connect the programmer to the SWD pins on the NT module.
3. From the STorM32 GUI select the Flash Firmware Tab and set the fields as seen below:
4. Select the Flash Firmware button and a DOS window opens similar to below:
Updating Firmware
For updating the NT firmware you may again use the methods described before, but preferably the "canonical" procedure described in Updating the Firmware of NT Modules.


